Mastering the setup of a digital clock is essential for ensuring accuracy in daily schedules and routines. A digital clock with 5 buttons often features settings for adjusting time, date, alarm, and sometimes additional functionalities like temperature display or dual time zones. Understanding how to configure these clocks not only maximizes their utility but also enhances convenience in our everyday lives. This article provides a detailed guide on how to set a digital clock with 5 buttons, ensuring that anyone can follow the steps to manage their time effectively. Whether in your home, office, or on a travel watch, mastering these settings can significantly improve your time management skills.
Identifying the Buttons

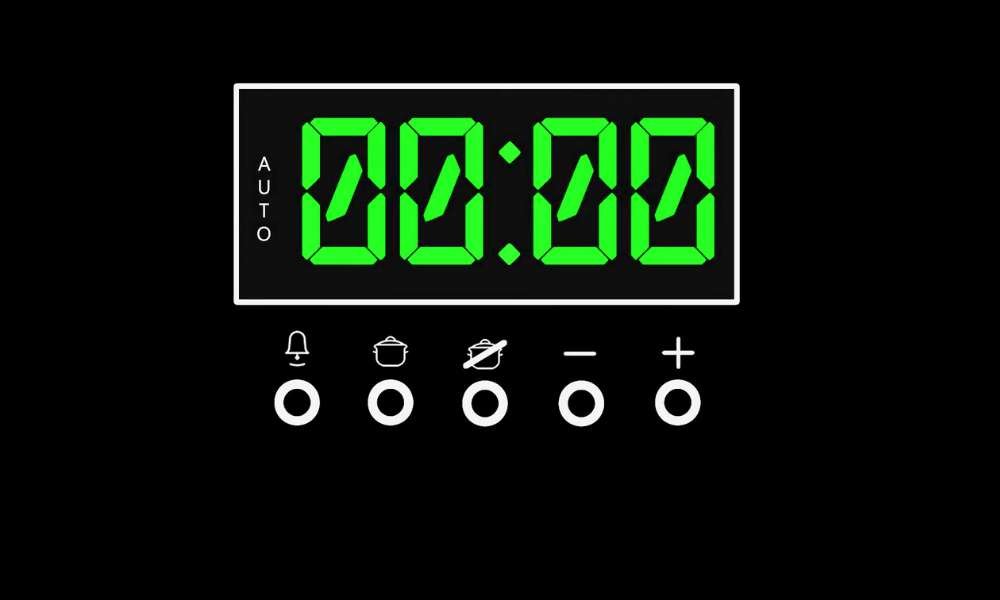
Before setting your digital clock, it’s crucial to familiarize yourself with its five primary buttons, each designed for specific functions. Typically, these include the ‘Mode’ button, which switches between different settings; the ‘Set’ button, used to confirm changes; ‘Up’ and ‘Down’ buttons for adjusting values; and a ‘Reset’ button to revert settings to default or correct errors. Most digital clocks have these buttons distinctly labeled and positioned for ease of use. For visual learners, an accompanying diagram showing the button layout on a standard digital watch can significantly simplify the setup process, making it intuitive to manage and adjust settings as needed.
Preparation Steps Before Setting the Clock
Before you begin setting your digital clock, it’s crucial to ensure that the device is ready and operational. Start by checking the power source or battery life to confirm that the clock has sufficient power. A weak or depleted battery can affect the accuracy of the settings. Next, observe the display to verify that the watch is functioning correctly; it should be clear and visible. If the display is dim or unresponsive, you may need to replace the batteries or reconnect the power supply. Ensuring these elements are in order can prevent disruptions as you proceed to set the time and other features.
Entering the Setting Mode
To configure your digital clock, start by entering the setting mode, typically initiated by pressing the “Mode” or “Set” button. On most models, holding this button for a few seconds activates the settings menu displayed on the clock’s screen. Navigating this menu might vary slightly depending on the watch model, but generally, subsequent presses of the “Mode” or “Set” button will cycle through options such as time, date, and alarm settings. For a smoother setup experience, pause briefly on each selection to ensure you’ve landed on the desired setting option before making adjustments.
Setting the Time
To accurately set the time on your digital clock with 5 buttons, begin by pressing the ‘Mode’ or ‘Set’ button until you reach the time adjustment screen. Use the ‘Up’ and ‘Down’ buttons to adjust the hours and minutes. These buttons typically increment or decrement the time values. For clocks that differentiate between AM and PM, continue pressing the hour button until it cycles through the morning and evening periods as needed. This step is crucial for those requiring precise time management, ensuring your digital clock displays the correct time throughout the day.
Setting the Date
Setting the date on a digital clock with 5 buttons is a straightforward process that can significantly enhance your experience with the device. To adjust the day, month, and year, first press the ‘Mode’ button until the date setting option appears. Use the ‘Up’ or ‘Down’ buttons to change the values accordingly. For handling different date formats, such as DD/MM/YYYY or MM/DD/YYYY, press the ‘Set’ button to toggle between the formats after setting the correct date. This feature is particularly useful for users who travel frequently or live in regions where different date formats are preferred, ensuring the clock remains versatile and user-friendly.
Setting Alarms (if applicable)
Setting alarms on a digital clock with 5 buttons is a straightforward process designed to enhance your time management. Begin by pressing the ‘Mode’ button until the alarm setting option appears. Use the ‘Set’ or ‘Adjust’ buttons to enter alarm configuration mode. Here, you can use the ‘Up’ and ‘Down’ buttons to set the desired wake-up time. If your watch allows, you may also set multiple alarms. Don’t forget to adjust the snooze intervals and alarm tones, typically done by pressing the ‘Set’ button again or cycling through options with the ‘Mode’ button. Confirm all settings by pressing the ‘Set’ button a final time to activate the alarm.
Using Additional Features

Digital clocks with 5 buttons often come equipped with additional features that extend beyond just showing the time. These may include a backlight for enhanced visibility in low-light conditions, a temperature display for ambient awareness, and the ability to manage multiple time zones, which is particularly useful for travelers. To activate and adjust these features, typically, the ‘Mode’ button cycles through the available options, allowing users to select their desired function. Adjustments can then be made using the ‘Up’ and ‘Down’ buttons to tailor the settings to your specific needs, ensuring that your digital clock fully caters to your lifestyle and environment.
Troubleshooting Common Issues
When setting a digital clock with 5 buttons, common mistakes often include incorrect AM/PM settings or mixing up day and month formats. To correct these, double-check your entries during setup and use the mode button to cycle back if an error occurs. If the watch does not respond to button presses, first ensure it is powered correctly, either by checking the batteries or the main power connection. Should issues persist, try a soft reset by removing the power source for a few minutes. This can help clear any glitches and restore the clock’s responsiveness, allowing for proper setup and use.
Conclusion
In conclusion, setting a digital clock with 5 buttons involves entering the setting mode, adjusting time and date, and setting alarms, among other functionalities. By following the steps outlined in this guide, you can effectively manage and utilize your digital clock to its fullest potential. We encourage you to explore additional features that your watch may offer, such as temperature readings or different time zones, to enhance your daily routines. If you encounter any persistent issues or require further assistance, do not hesitate to contact the manufacturer’s support team for expert guidance and troubleshooting tips.
