Replacing a clock mechanism can restore your favorite timepiece to perfect working order without the need to buy a new one. Whether your clock has stopped ticking or its hands are no longer moving accurately, learning how to replace clock mechanism is a simple and cost-effective solution. In this guide, we’ll walk you through the step-by-step process, from removing the old mechanism to installing a new one, ensuring your watch works like new again. Follow these easy instructions to breathe life back into your cherished timepiece.
“How to Replace Clock Mechanism: Step-by-Step Process”
- Gather the necessary tools and materials: Make sure you have a new clock mechanism, screwdriver, and pliers on hand.
- Remove the clock hands: Carefully pull the clock hands off the watch face without bending them.
- Detach the Old Mechanism: Unscrew the back of the clock and gently remove the old mechanism.
- Select the Right Replacement Mechanism: Ensure the new mechanism matches your clock’s size and design.
- Install the New Mechanism: Insert and secure the new mechanism in place.
- Reattach the clock Hands: Place the hands back in position, ensuring they are aligned correctly.
- Test and Adjust: Test the clock to ensure it’s working properly, making any necessary adjustments.
Tools and Materials Needed
When replacing a clock mechanism, having the proper gear and substances is essential for a smooth and trouble-loose manner. You’ll need a small screwdriver, a couple of pliers, and a brand new clock mechanism kit that fits your watch’s length. The kit typically consists of the watch motor, arms, and hardware.
Using remarkable gear ensures you avoid detrimental delicate parts of the watch at some point of substitute. Choosing the right mechanism is prime to ensure proper feature and long-time period performance. These easy gears and substances will make the method efficient and straightforward.
Step 1: Removing the Clock Hands

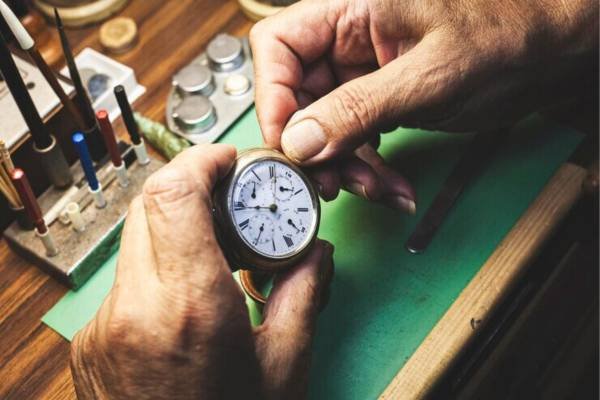
To update your wall clock mechanism, start by cautiously doing away with the watch fingers to avoid harm. Gently elevate the hour and minute palms using a small, flat tool or your palms. Be careful not to apply immoderate pressure, as this may bend or crack the hands. Place the hands on a smooth material to prevent scratches.
If your clock has a 2nd hand, remove it ultimately. Handling these delicate components with care guarantees they stay in desirable condition for reinstallation, making the whole substitute system smoother and more effective.
Step 2: Detaching the Old Clock Mechanism
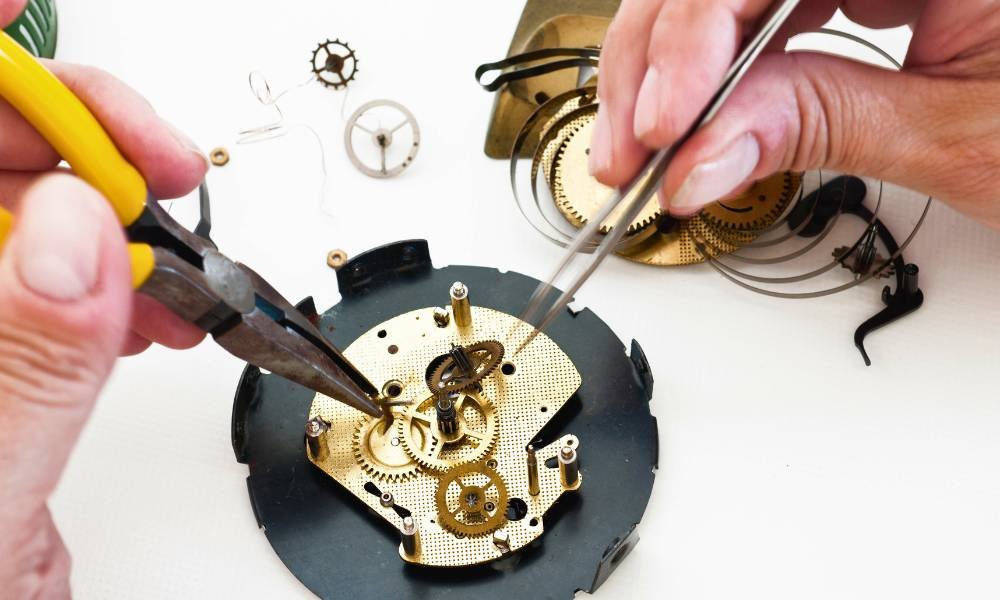
start by carefully unscrewing the return of the clock using a screwdriver. Gently pull out the vintage mechanism from the watch face. Be cautious of small components that could fall out for the duration of removal. Common problems include tight screws or a mechanism that’s caught because of antique adhesive.
If the mechanism resists removal, use pliers for a less assailable grip, but keep away from excessive force to prevent unfavorable the watch. Properly handling these steps ensures an easy transition to the new clock mechanism.
Step 3: Choosing the Right Replacement Mechanism
Selecting the correct replacement mechanism is crucial for ensuring your clock operates smoothly. First, match the new mechanism to your watch type and size to ensure a proper fit. Consider the length of the clock hands; the mechanism must accommodate them without obstruction.
Additionally, choose a mechanism that complements your watch face style and design. Lastly, select the appropriate motor type—quartz for precision or a more traditional movement if preferred. By carefully considering these factors, you can ensure a seamless replacement and continued accuracy for your watch.
Step 4: Installing the New Mechanism
To install the new clock mechanism, start by positioning it carefully into the clock face. Align the mechanism with the mounting hole, ensuring it sits flush against the watch. Gently tighten the securing nut to hold the mechanism in place, making sure it’s snug but not overly tight.
Proper alignment is crucial; check that the mechanism is centered and that the clock hands move freely without obstruction. Once securely in place, verify that the mechanism functions smoothly before reassembling the watch. This step ensures accurate timekeeping and a seamless operation.
Step 5: Reattaching the Clock Hands
To reattach clock hands for accurate timekeeping, carefully align each hand on the new mechanism. Start with the hour hand, ensuring it sits flush against the mechanism’s shaft. Next, place the minute hand, making sure it moves freely without obstruction.
Finally, add the second hand, if applicable, aligning it precisely. Adjust each hand for perfect alignment to avoid interference with one another. Once in place, gently press the hands down to secure them. Check the clock’s movement to confirm that the hands move smoothly and accurately, ensuring reliable timekeeping.
Step 6: Testing the New Mechanism
Testing the clock after putting in the brand new mechanism is critical to ensure it features correctly. Once the fingers are reattached, set the watch and look at its operation over a few hours. If it’s no longer running nicely, test for misalignment of the hands or loose fittings.
Ensure the battery is successfully installed and fully charged. If issues persist, consult the mechanism’s guide for unique troubleshooting suggestions or don’t forget contacting a professional. Proper checking out guarantees that your clock will keep accurate time and function easily.
Maintaining Your Clock After Replacement
After changing your clock mechanism, right maintenance is crucial for making sure its durability and dependable overall performance. Regularly dust the watch to save you debris from interfering with the mechanism. Keep the watch in a strong environment, warding off extreme temperatures and humidity.
Lubricate the shifting elements as endorsed by the producer to lessen wear and tear. Check and alter the watch palms periodically to make sure they’re aligned efficiently. By following those fine practices, you can limit the threat of destiny problems and enlarge the lifestyles of your newly hooked up clock mechanism.
FAQs for: How to Replace Clock Mechanism
1. How do I remove the old clock mechanism?
✅Unscrew the back panel of the clock and carefully detach the old mechanism.
2. Can I use any clock mechanism for my watch?
✅No, ensure the replacement mechanism fits the size and style of your clock.
3. What should I do if the clock hands are misaligned?
✅Adjust the hands gently to ensure they are properly aligned and do not touch each other.
4. How often should I check the clock mechanism?
✅Regularly check for accuracy and smooth operation to catch any issues early.
5. Is lubrication important for the brand new mechanism?
✅Yes, lubricate shifting parts as according to the manufacturer’s instructions to hold the mechanism jogging smoothly.
Conclusion
In conclusion, know- How to Replace Clock Mechanism can prevent money and time at the same time as revitalizing your timepiece. By following the mentioned steps—from accumulating equipment to testing the new mechanism—you may make certain an easy and a hit substitute process. Regular protection and right care will in addition decorate the toughness of your watch, preserving it accurately and reliably. With the right method and attention to detail, you can revel in your clock’s capability for years to come. Embrace this DIY project with self assurance and revel in the outcomes!